The latest Final Cut Pro 10.4.6 is out with a bump in improvements from 10.4.4 and of those, video noise reduction I’ve found the most useful. That’s because I’ve been using a drone to set the scene in a personal project about the viaduct.
And, for an aerial view of the landmarks I photography, like the Alki Point Lighthouse.

The drone I’m flying is the DJI Mavic Platinum Pro (with shoulder bag bundle, $969 on Amazon). Compared to the Mavic Air I’ve also flown, it’s much easier to control and significantly quieter. The prop noise isn’t like the buzzing people want to punch. It’s more of a hum.
The drone’s sensor is a 1-inch, 20-megapixel CMOS sensor with a f/2.8-11 aperture. For comparison, the sensor in Sony’s popular RX line is also 1 inch and the sensor in an iPhone is 1/3″. Without getting into what all the different sizes mean (I shoot full frame), the smaller the sensor the more noise and especially in high dynamic range scenes, like over water on a bright spring day with the subject in shadows.
That’s even with using a polarizer on a gimbal lens.
To Reduce Noise in Final Cut Pro 10.4.6
For the photographers like me that dabble in FCP, here’s how to reduce noise on your clips.
- To open the Effects Browser, choose Window > Show in Workspace > Effects (or press Command–5).
- In the Video category of the Effects browser, click Basics to display effects for standard video clips. You can also type in “Noise Reduction” in the search field at the bottom of the Effects browser.
- To preview the Noise Reduction effect on the clip in your timeline, skim the Noise Reduction effect thumbnail in the Effects browser.
- Drag the effect to the clip in the timeline. The first time you add the effect, Final Cut Pro analyzes the clip for noise. You can see the results in a second or two after Final Cut Pro has completed the analysis.”
If you’re adding multiple effects to a clip, add Noise Reduction as the first effect, so that it appears at the top of the effects list. You can also drag the Noise Reduction effect to the top of the list to rearrange the order of processing. This ensures the best performance and results.
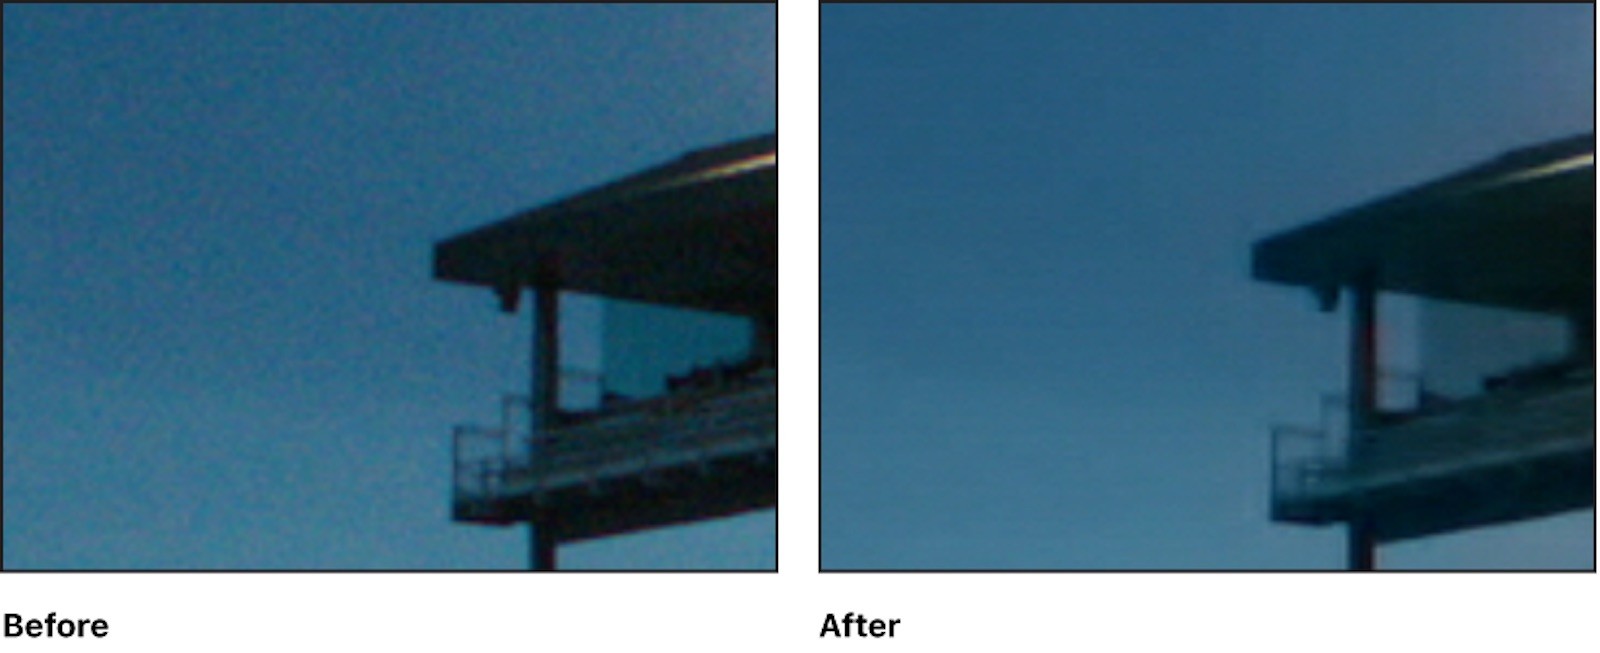
Before this update, a plugin was required that worked ok. Here’s the result.
More About Final Cut Pro
…My daily shooter is Sony A1 with a vertical grip and various Sony lenses attached like the FE 20mm F1.8. Find more gear recommendations in our shop. As an Amazon Associate I earn from qualifying purchases.